What are 3rd Party Integrations?
3rd Party Integration layers allow you to bring in dynamic content from other websites. Custom URL overlays like Rainmaker and StreamElements are a great way to showcase recent subscribers, donations, stats from your game, and more! They are available to use for both Studio 1 and Studio 2 users.
Personalized messages are a great way to engage your audience and encourage more active participation in the stream. In this post, we’ll be going over just how easy these integrations are to add and use. Let’s get started.
Adding the 3rd Party Layer to Lightstream
Every stream integration works similarly in Lightstream. Each of them outputs stream graphics to a URL link that you’ll copy and paste into your scene. First you’ll add a new layer and select 3rd party integrations. As you can see from the supported 3rd Party Integrations list, there’s a bunch of services available that you can add to your project.
If you don’t see the one you want to use, you can try the Browser Source option which will pull in any web link you paste into it. Some websites block embedding and will prevent them from loading in Lightstream – you’ll have to experiment and see what works. For overlay developers our previous Blog post HERE has a more extensive breakdown ensuring compatibility with Lightstream Browser Source layers.
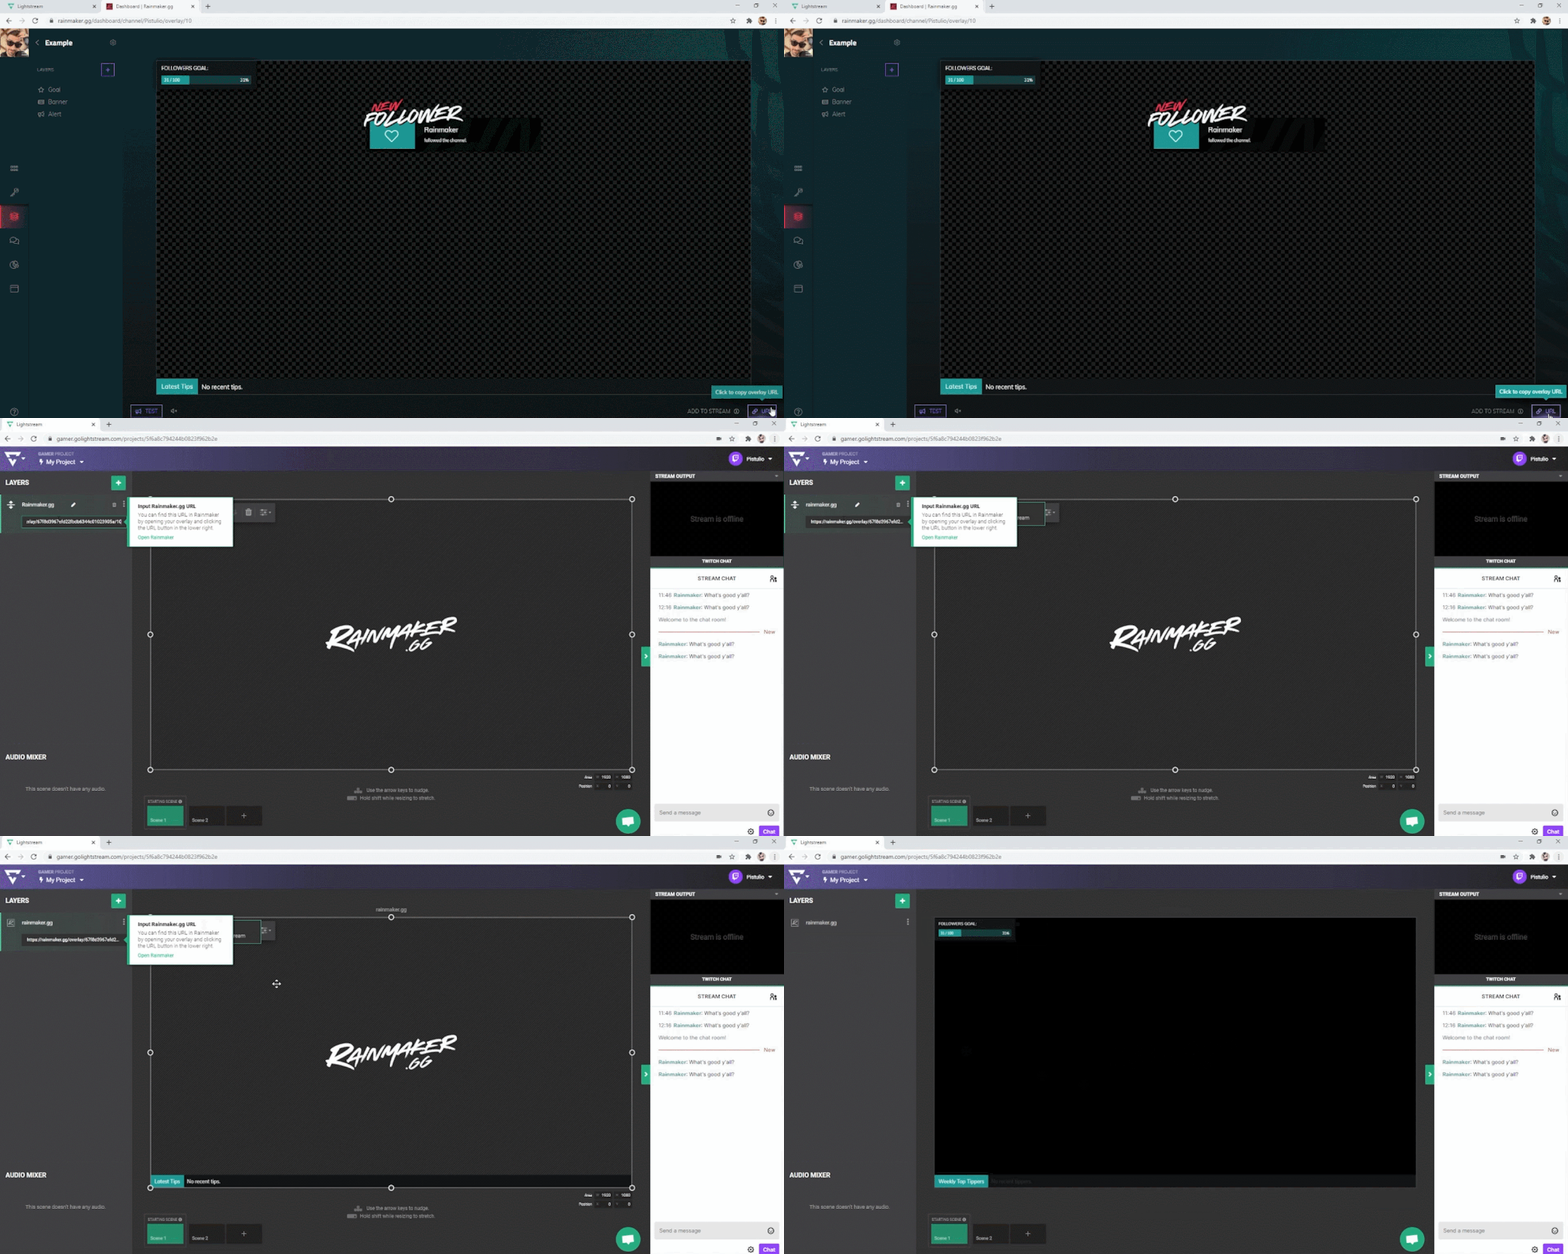
For this example, I’m going to add a Rainmaker layer. Rainmaker is a full overlay editor that supports interactions like alerts, tipping, and a chat bot. A placeholder for your content will appear on the canvas. Please note that the logo in the project area will not display on stream, it’s merely to demonstrate where the overlay will appear.
You can then retrieve your overlay URL to copy into layer on your scene. I’ve already setup an overlay to use in my project – so let’s hop over to Rainmaker and grab it.
Loading in and testing your 3rd Party Layer
I’ll navigate to my Rainmaker overlays dashboard section to copy the URL from my overlay list there or in the bottom right corner of the Rainmaker overlay editor itself. Then paste the URL into the Rainmaker layer of my project’s scene in Lightstream.

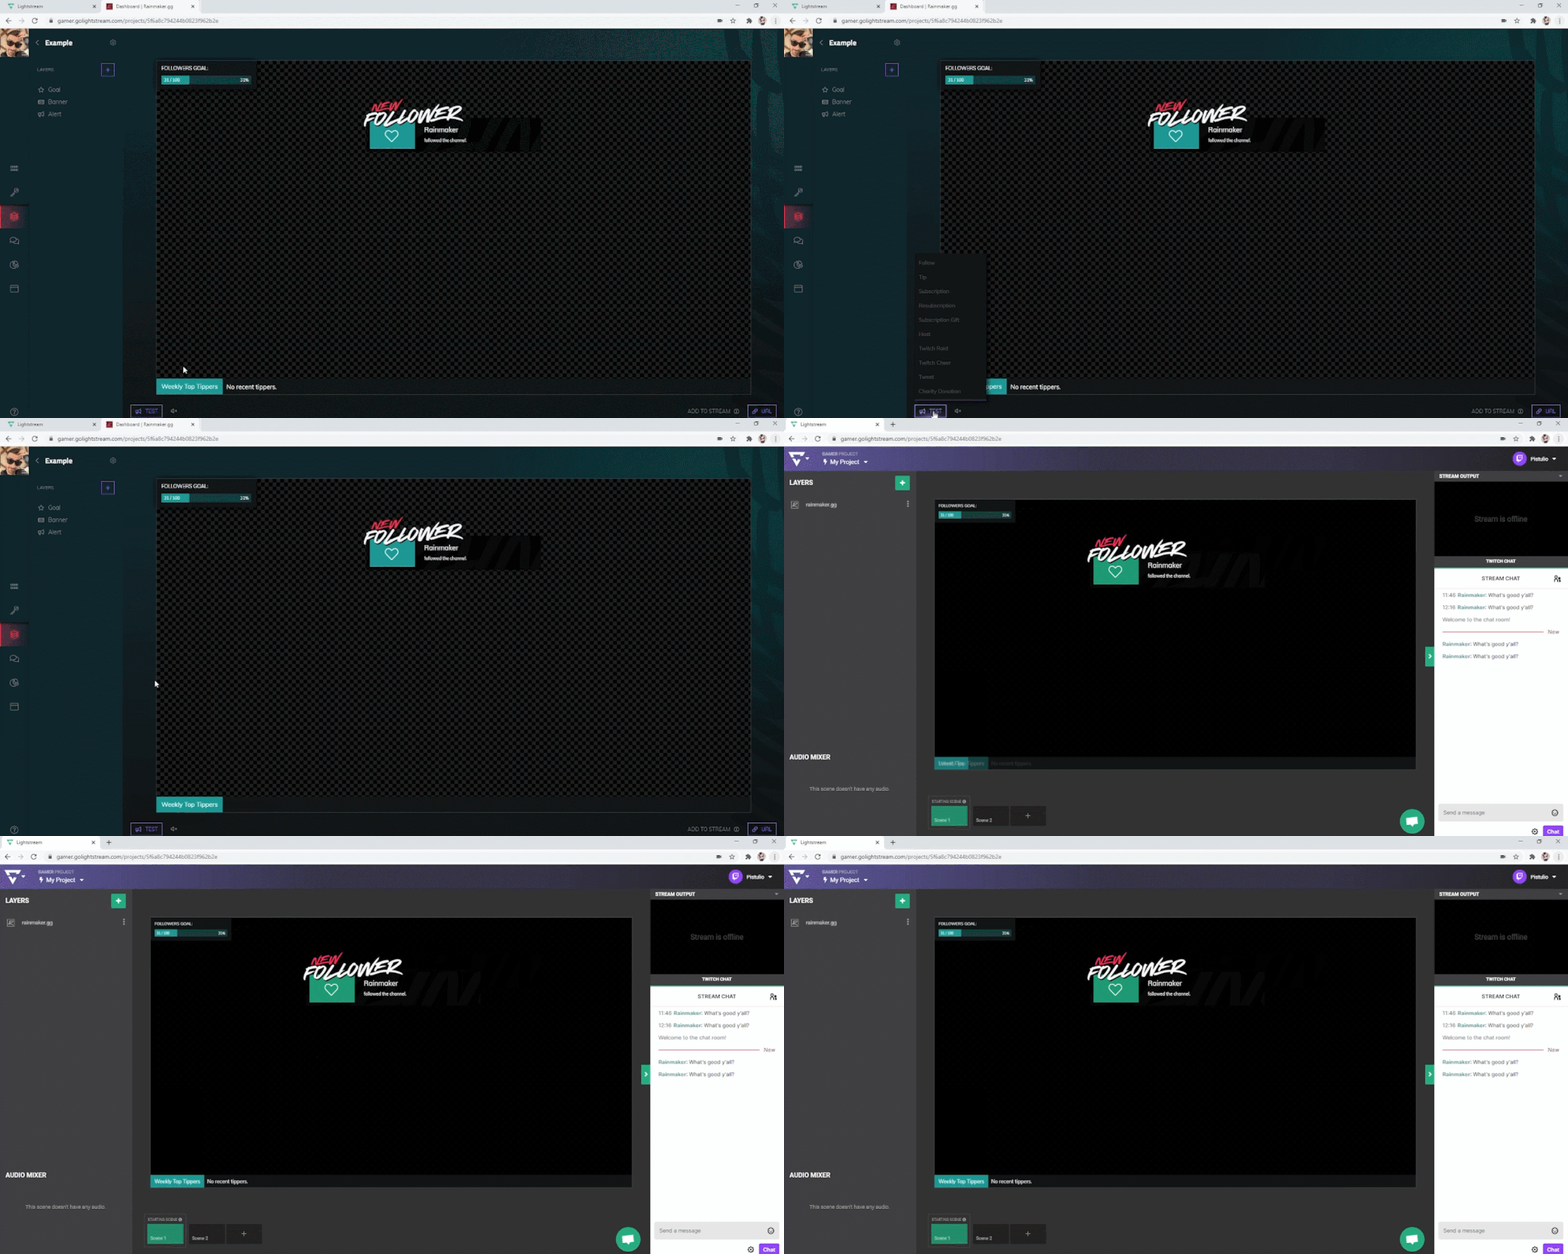
You’ll see the layer update with the overlay in your scene that you created. If the overlay includes an interactive feature like an alertbox for example, you can also use the test button features on the site to see how your alerts would look on stream. For Rainmaker you’ll find that test option at the bottom of your overlay editor.

Resizing vs Scaling your 3rd Party Layer
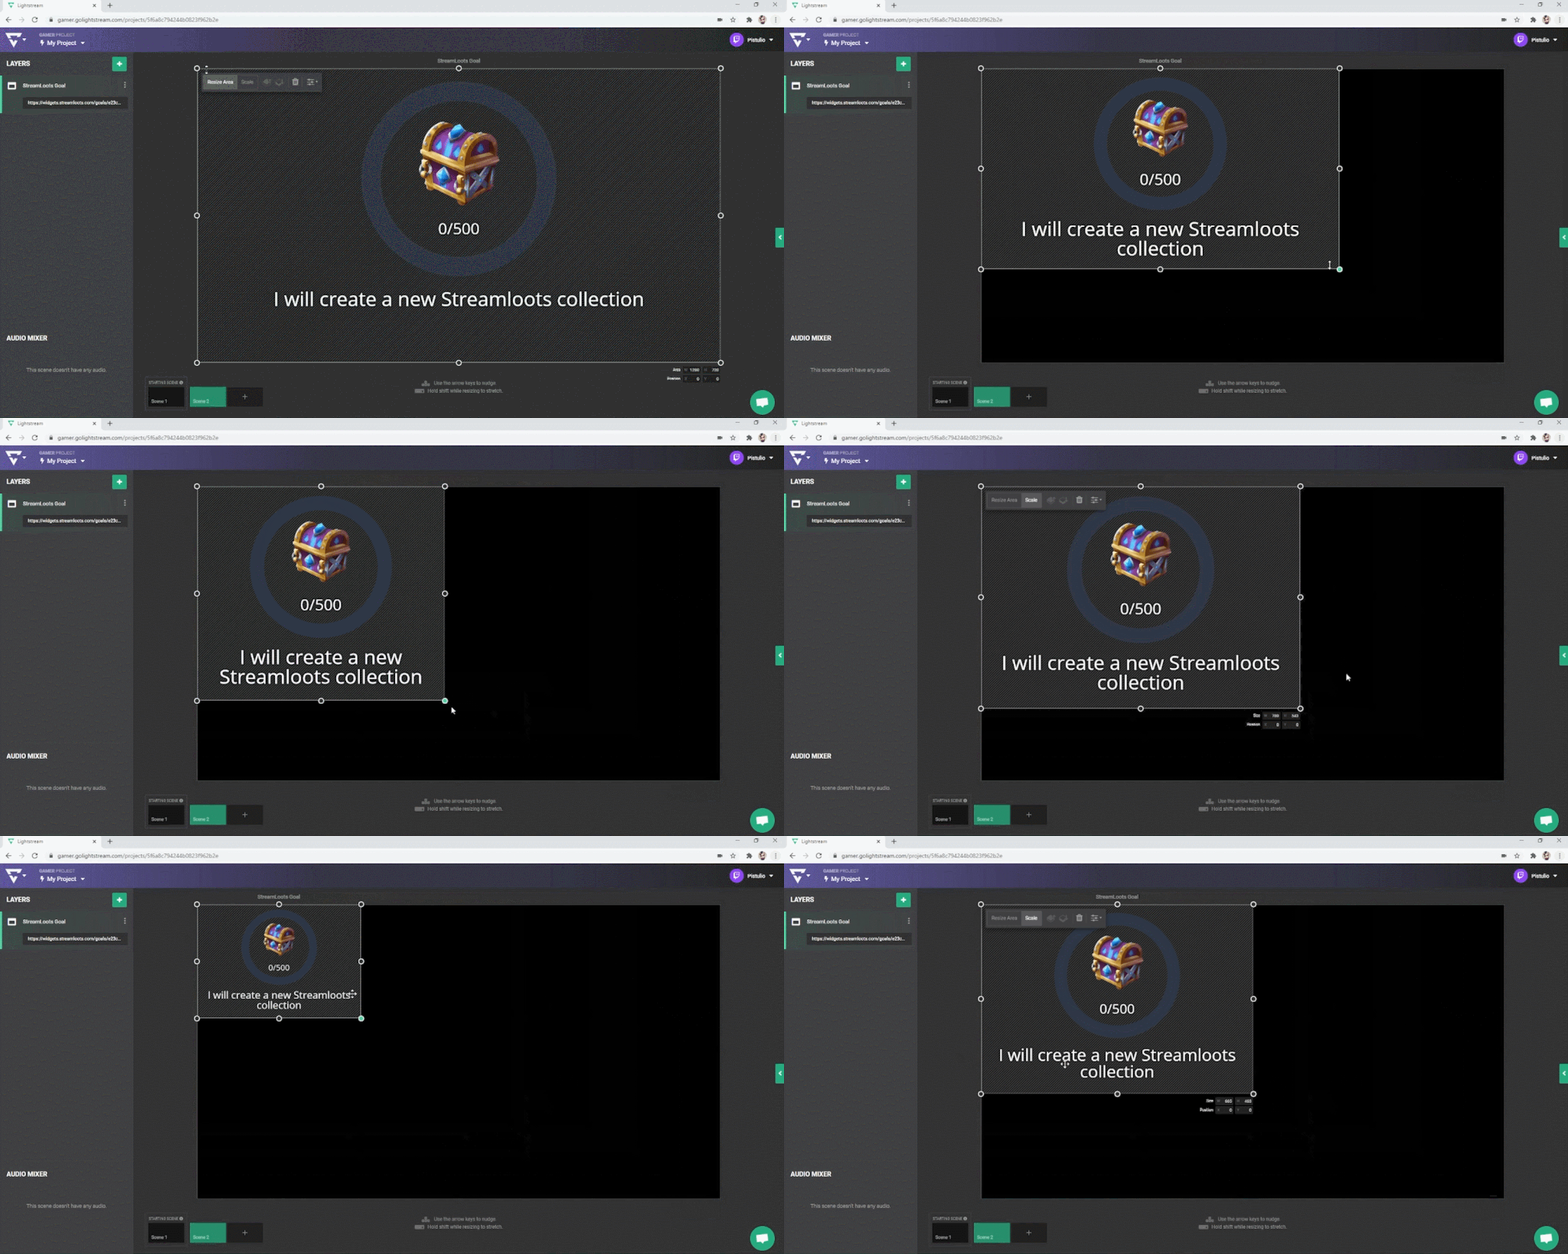
3rd Party Integration layers are unique in that they have two different sizing options. Dragging while “Resize Area” is selected changes the size of the box the content loads into. You can think of this like resizing your browser. If there’s responsive content, it will adjust to fit into the space available.
Scaling will keep the proportions of the overlay intact, see how everything proportionally gets smaller or larger as I drag?

This is just one example of how to use our 3rd Party Integration layers. There are a bunch of options to add dynamic content to your stream including adding your own custom overlay through the Browser Source layer. You should definitely play around and explore all of your options and see what best fits your needs.


