Summary
A guide on streaming Warzone 2 from console without a capture card
Let’s talk about the biggest opportunity that you have as a Warzone 2 content creator. All you need is your console, whether it be PlayStation or Xbox. Lightstream is going to help you save hundreds of dollars. Instead of going and building a streaming PC or even buying a pre-built PC just to encode your Twitch stream, you can use Lightstream to stream directly from your console without the need for an expensive PC or capture card.
You can find a video tutorial for this process below but if you prefer a written guide, just keep reading!
Setting Up
Let’s run through the basics of getting set up with Lightstream. Oh, and let me mention, there is a seven day free trial on all subscriptions, so there’s no harm in trying this out! In this guide we’re going to run through setup on an Xbox, but PlayStation users can find a setup guide under “Help and Resources” below!
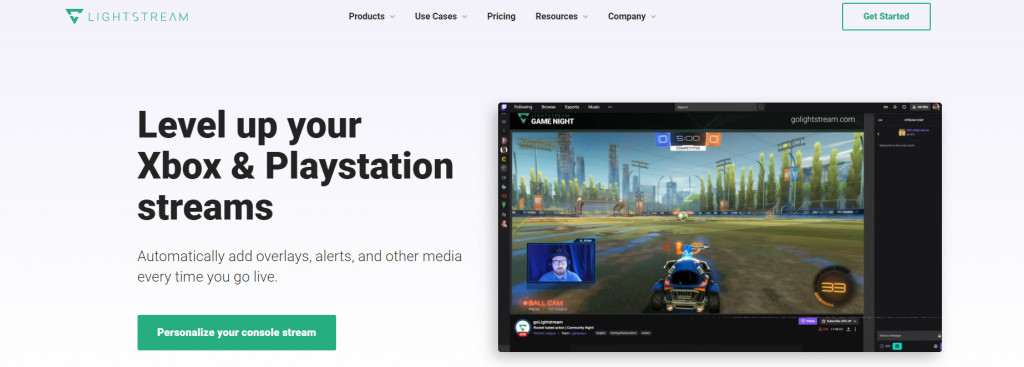
First thing you’re going to want to do is visit our website and hit personalize your console stream. From there, you can sign up for a Lightstream account with your Twitch information. Since this is your first time logging in, you’ll need to select a subscription plan. All plans will be able to allow you to stream from your Xbox, and include that 7 day free trial I mentioned!
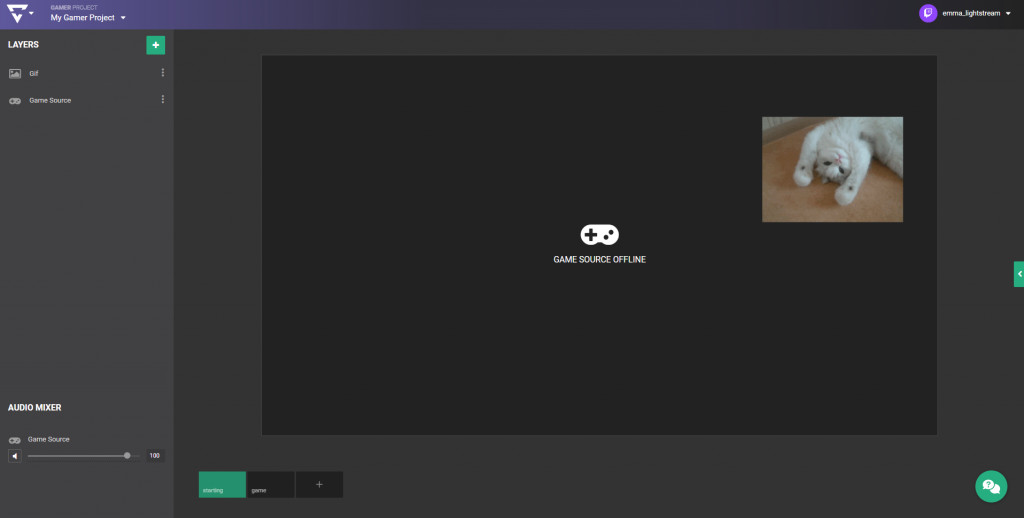
Once your account has been created, Lightstream will create your first project for you. You can create multiple projects for different show setups, just remember that gamer projects are the only project type that can receive a feed from your Xbox without a capture card. You can tell if you’re in a gamer project by the purple bar up top or looking at the label in the top left.
If you find yourself in a creator project, you can switch by using the drop down menu in the top left.
Next, let’s take a look at our project. I’ll name mine Xbox, and set the resolution to 1080P 30 fps. Since I’m streaming from my Xbox, I’ll need to enable the auto live option, which tells Lightstream which project to send your game feed to. The project will automatically start sending the overlays to your channel when it receives the feed so you can go live even when you don’t have Studio open.
Now that we’re done with our project settings, we can start designing our scenes. The canvas area is where you can position and preview. The layers panel on the left is where you can add new capture sources as well as media. As you can see, there are a bunch of different layers you can add to customize your stream.

First, let’s get the live feed from my Xbox. The game source layer displays whatever your Xbox is broadcasting. You should also keep in mind that if you add your camera or microphone from your Xbox, it’ll come through as a part of your game source layer.
But what should I add to my stream anyway? Let’s say I’m wanting someone discovering my stream for the first time to know who I am, so for that I could add a branded overlay by adding an image layer with my logo. For more dynamic content like a follower alert or displaying a subscriber account I could use a third party integration like StreamElements or Rainmaker. Play around and get creative!
 Rainmaker is a full overlay editor that supports interactions like alerts tipping, as well as a chat bot. You can find more information about adding Rainmaker to Lightstream studio in our support article.
You might want to add something like a starting soon video to run for a bit before you start playing. This is where scenes come into play. You can find them at the bottom of Studio under your canvas and rename them to something descriptive. Your starting scene is the first in the list and will be the scene that pops up when you hit go live, so make sure you’ve got them in the right order! Now all you need to do is add the video clip to your scene using a video layer and you’re good to go!
How to go Live
We’re ready to go live. But how on earth do we do that and have all our overlays show up?
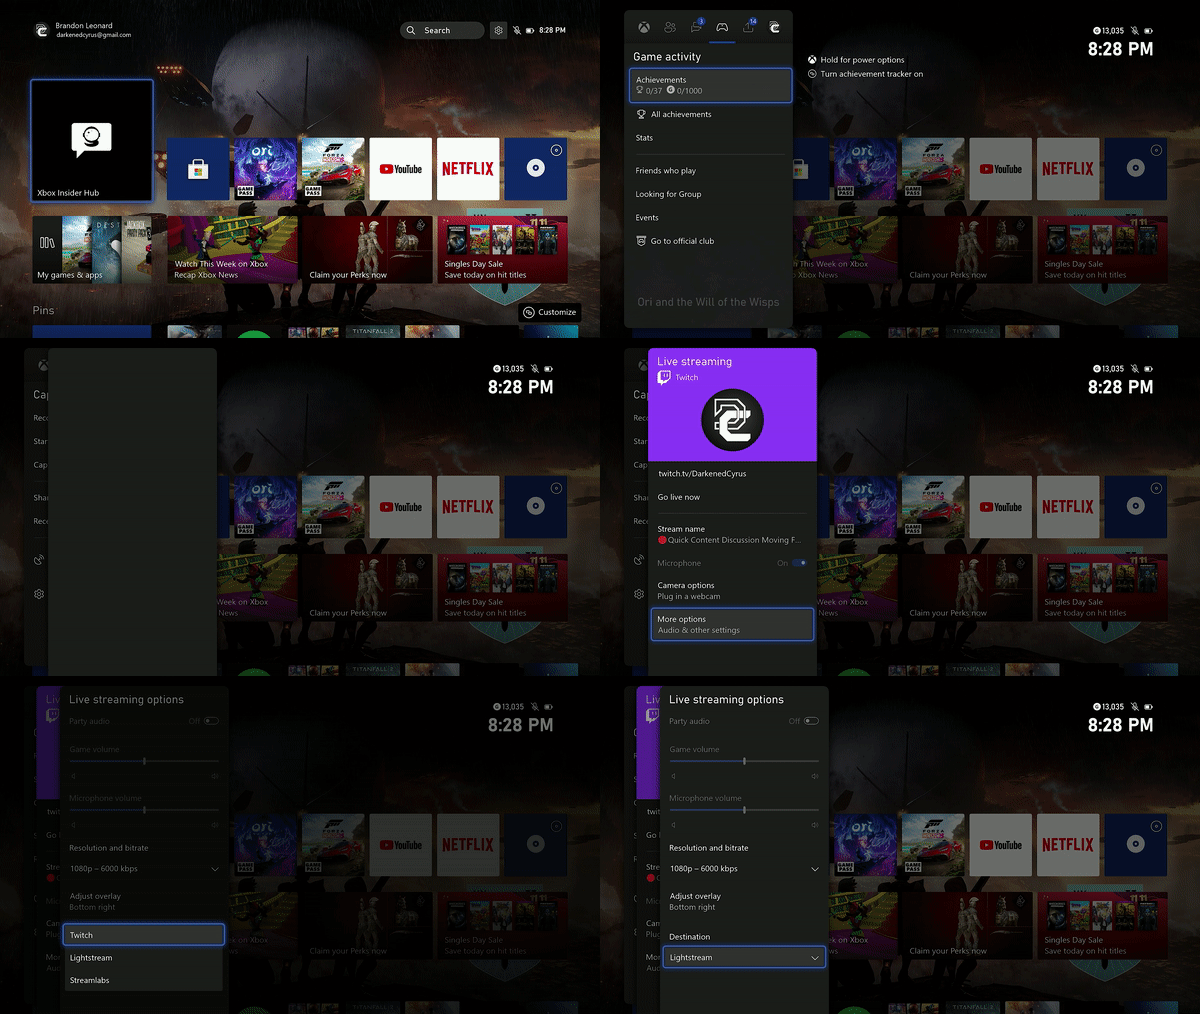
- Open the Xbox Capture & Share menu (You can do this by holding down the Xbox button on your controller and navigate to the Xbox Capture & Share menu)
- Go to “Live streaming”
- Go to “More options”
- Set the destination to Lightstream

Note: If you were previously using our DNS method, make sure to set your Xbox’s DNS settings back to “Automatic”
Once you’ve done this you’re all set to start broadcasting and instead of going directly to Twitch, your Xbox will now broadcast to Lightstream, which will add all of your personalizations before passing it onto your Twitch channel. You’ll want to make sure your Xbox’s streaming resolution and framerate match your subscription.
You’ll notice you can see a live feed of your Xbox broadcast in your game source layer to confirm that everything is working as expected when you’re live on your live scene. Of course, your stream will begin on your starting scene, but when you’re ready to, simply click the scene you want at the bottom of the project.
If you don’t have a computer or you can’t be near one while playing, you can use our mobile remote from any mobile browser to change scenes while live.
Help and Resources
If you have further questions, check out our YouTube for tutorials, and join our Discord to connect with our community! Our Support Team is always happy to help you get set up if you need us!
PlayStation streamer? You can follow our video tutorials on getting set up below!


