Believe it or not, there’s more to live streaming on Twitch than turning on your webcam and launching a game; in fact, there are a number of ways that you can actually customize your Twitch channel to make it more visible and appealing to viewers.
From creating a custom Twitch overlay, to optimizing your channel settings, this guide will walk you through some of the best ways to improve your streaming experience and draw in more viewers. We’ll be covering:
- How to customize Twitch streams
- How to edit Twitch streams
- How to edit Twitch panels on mobile
- And more top tips for drawing in viewers
Whether you’re into Twitch IRL Streaming or casting your weekly Call of Duty session, customizing your stream is going to help you reach more viewers with higher-quality content. And, with the latest updates to the Twitch Creator Dashboard, customizing your channel has never been easier.
Let’s get started!
Want to look fully professional while streaming to your favorite platforms from home? Studio 2 is the answer. No downloads. No costly gear. Just focus on your stream.
Walkthrough: Customizing Your Twitch Channel
Interested in taking your Twitch channel to the next level? Let’s walk through the steps to successfully customize your account and reach a broader audience.

1. What can you customize?
Before you can begin pimping your stream and catching the eyes of your viewers, it’s important to understand exactly which parts of your Twitch channel you can customize – because there are plenty of things you can do!
The customizable parts of your Twitch account are:
- Channel name – you can change this to reflect your game or stream
- Avatar – make sure your picture is high quality and represents you well
- Banner image – this is a large banner that sits at the top of your profile and can be used to showcase your game or brand
- Info panels – you can customize the information that is displayed on these panels, including your social media links, schedule, and more

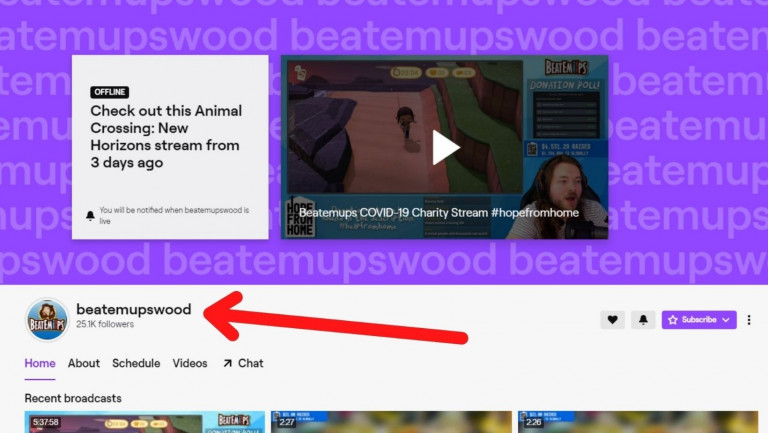
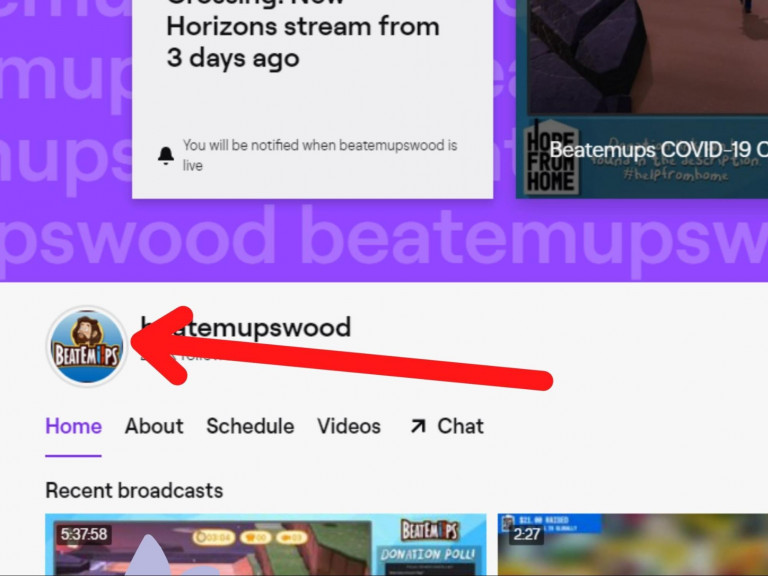
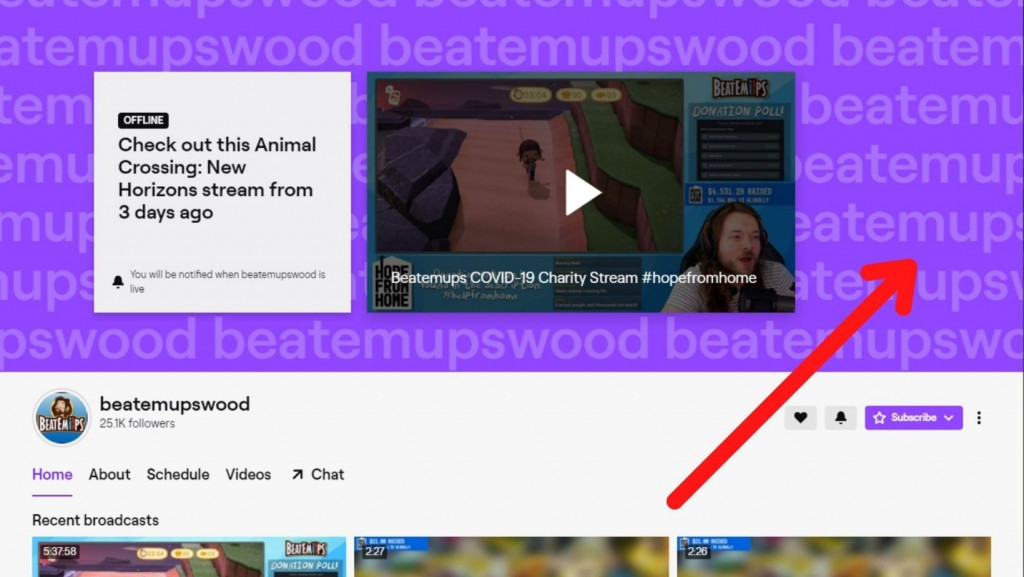
Your channel’s appearance is just as important as the appearance of your stream itself, so take the time to make it look great. This is an example of how your channel can look if you customize each of these list items and add a pop of color:
2. Customize your Twitch channel name and bio
Together, your name and bio give potential viewers a snapshot of what your streams are about. This means that you’ll want to make sure that they are both accurate and interesting.
Your username and display name should be short and easy to remember, while your bio can be a bit more detailed. Make sure to include what type of content you stream (like games, talk shows, etc.), as well as any other important information (such as your stream schedule).
How to edit your Username, Display Name, and Bio
- First, you’ll need to navigate to dashboard.twitch.tv.
- Go to Settings on the left-hand-side toolbar, then hit Channel. This will give you access to plenty of customization options, the first of which is your Username, Display Name, and Bio.
3. To change each of these, simply click on the fields and insert the desired text.
Note: you can only change your Username once every 60 days, and doing so will also alter your URL. On the other hand, changing your Display Name will not alter your URL and you can do it at any time.
To add a description to your channel, you need to add something called an Info Panel, which we’ll talk about in detail in the next section.
3. Customize your Twitch avatar and banner
The avatar is one of the first things that people will notice about you, so you should edit it to reflect your personality. You can use any image you want as your avatar, but it’s best to choose something that is both representative of you, and eye-catching.
If you don’t have any good images of yourself, consider using a character or logo from one of your favorite games or movies.
How to customize your avatar
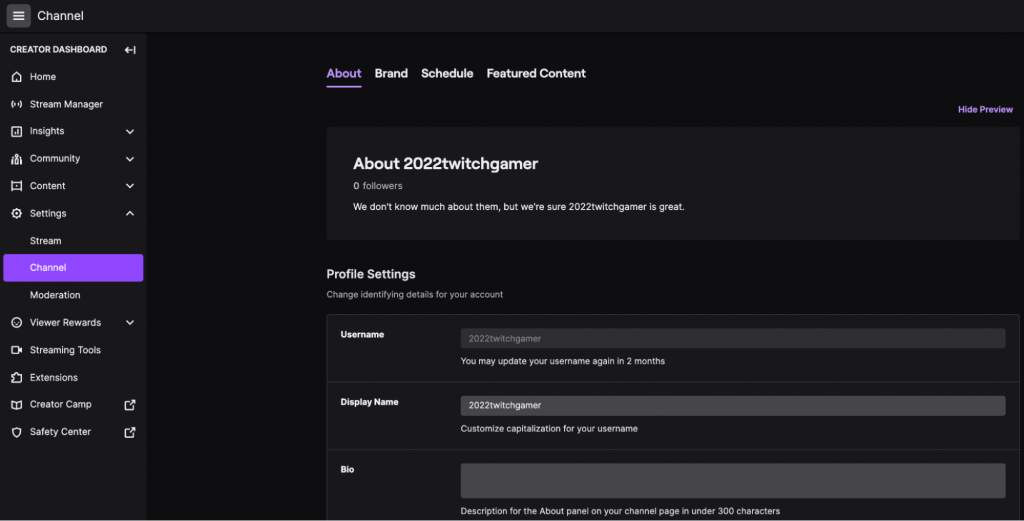
- As directed in the previous section, navigate to your Creator Dashboard > Settings > Channel.
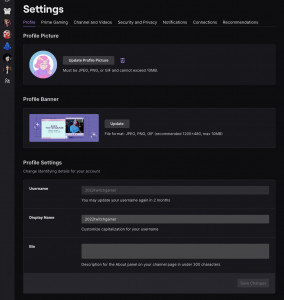
- In the tabs running along the top of the page, click on Brand. It should take you here:
3. Select Update Profile Picture. From there, you can edit your current avatar or upload a new JPEG, PNG, or GIF up to 10MB.
4. Hit Save, and you’re all done!
How to customize your banner
Banners are the cover image of your channel, and they are another great way to set your theme and aesthetic. You can use apps like Canva to make one, or design your own.
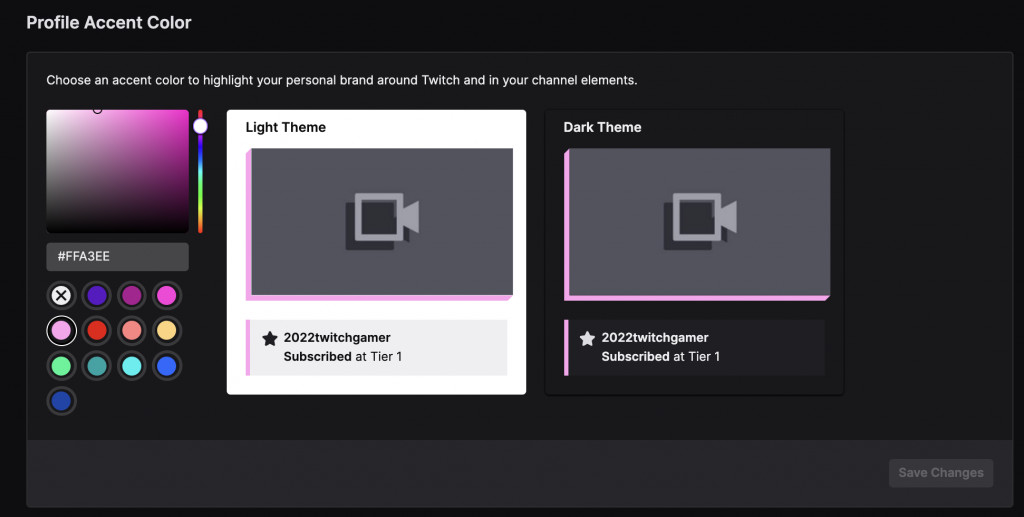
- Underneath the Profile Picture section in your Creator Dashboard (as outlined above), there is a section where you can choose to customize your colors and preview with Light Theme and Dark Theme.
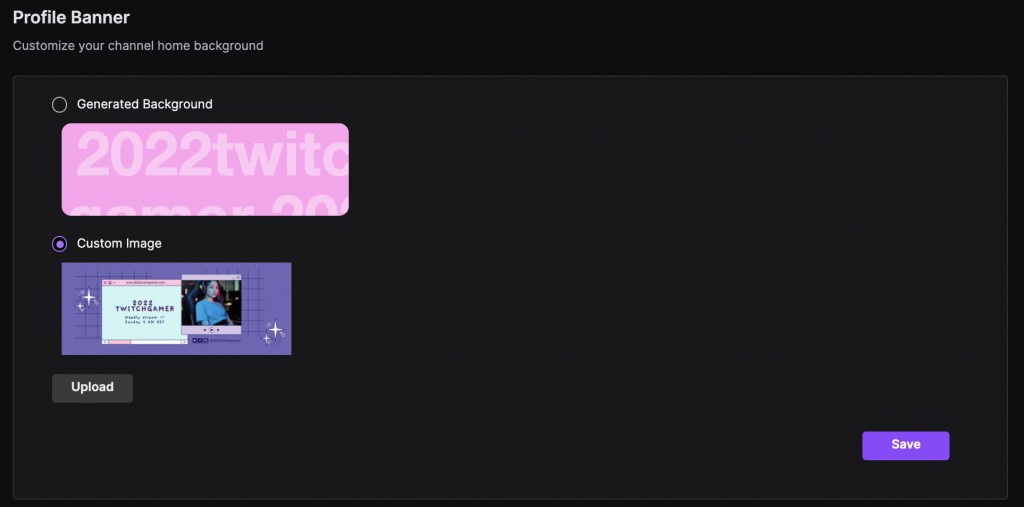
2. Once you have set your colors, scroll down to Profile Banner. This is where you can customize the background of your profile.
3. Choose to either use a Generated Background or upload a Custom Image, then click Save.
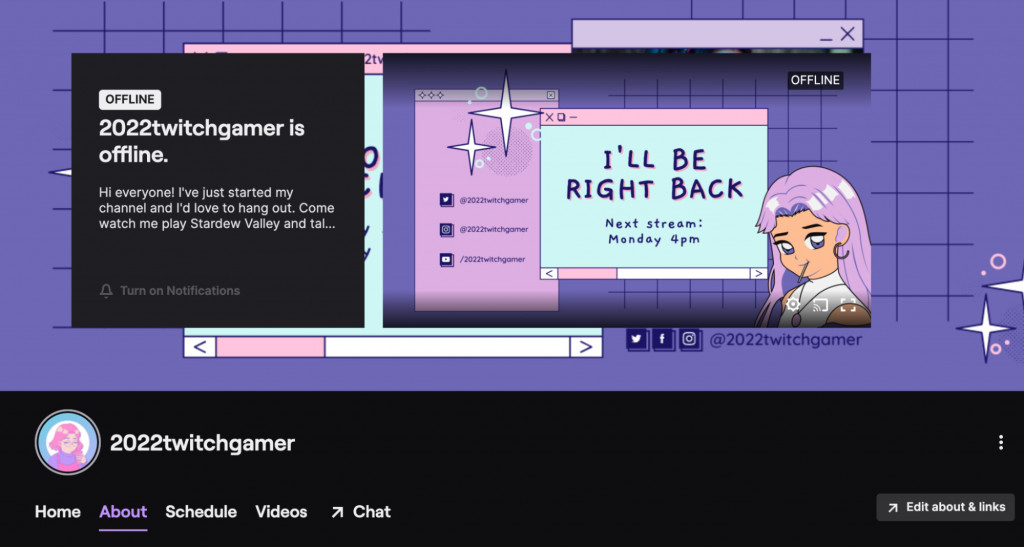
4. To update your Video Player Banner, scroll to the Video Player Banner box on the Brand page and click Update. You can then upload the image that your audience will see when you’re offline.
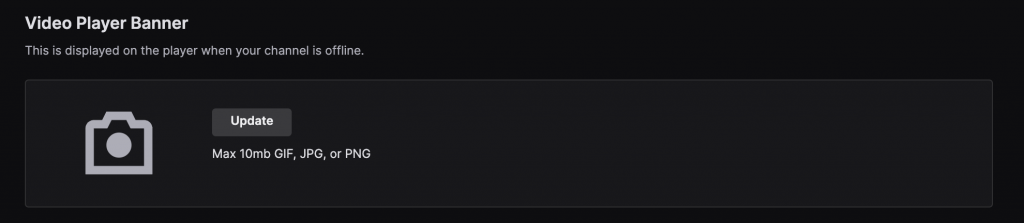
Tip: change your Video Player Banner frequently with information about your schedule, channel theme, or next upcoming stream, to keep your audience in the loop!
4. Add the final details
There are a few more details you can update through the Creator Dashboard, such as:
- Your social media links (Creator Dashboard > Settings > Channel > About)
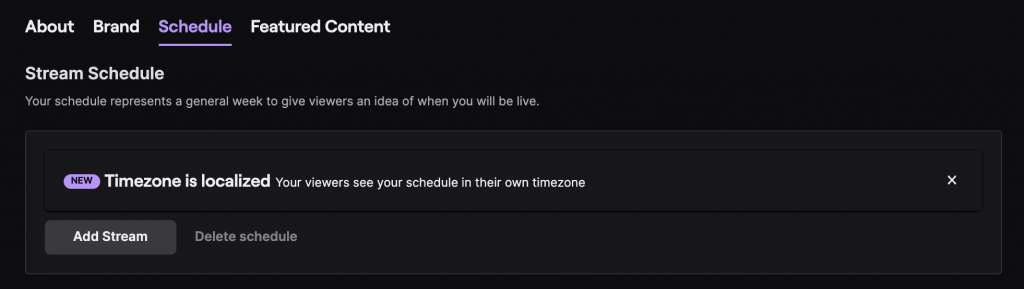
- Your streaming schedule, time zone, and calendar (Channel > Schedule)
- Your featured creators, channels, and content categories (Channel > Featured Content)
5. Create a custom overlay
Some live streaming software allows you to customize your channel further. With our Lightstream Studio, you can add an extra personal touch by using customized overlays. This means you can add things like backgrounds and borders, text, audio and video, and other app integrations.
To use a custom overlay in Lightstream Studio, follow these steps:
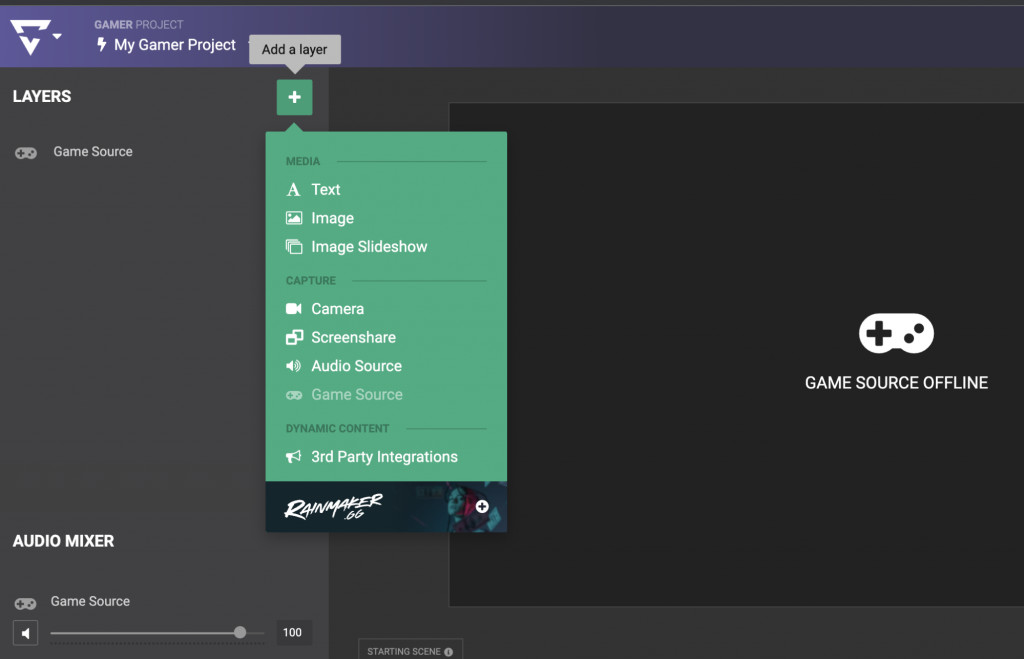
- Begin a new Gamer Project in Lightstream Studio. It should open up this page:
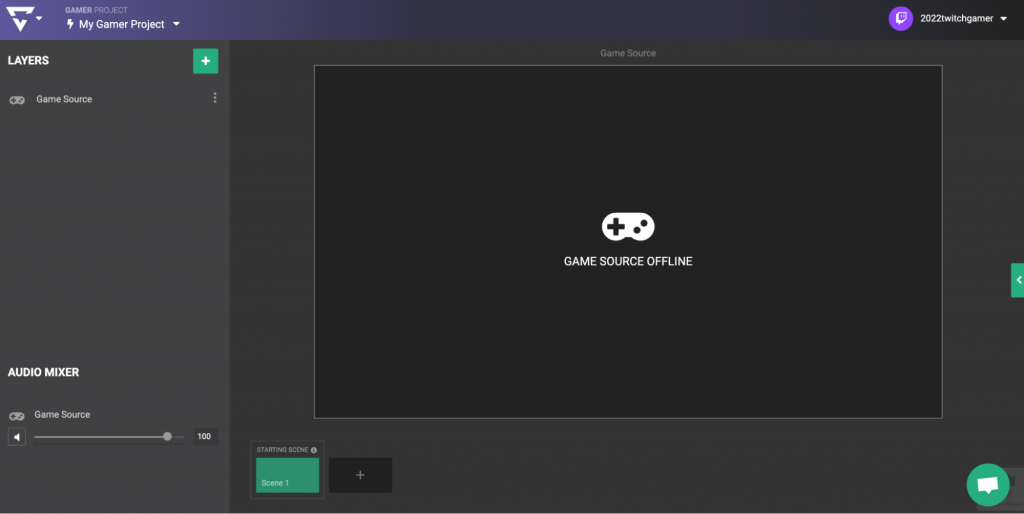
2. Then, click on the + icon in the green square. This is where you will be given the option to add custom overlays. You can add images, text, sound, and other third-party integrations:
Tip: you can easily design a border yourself through third-party apps like Canva and Figma. When designing your overlay, choose colors and graphics that suit the vibe you are trying to create with your channel.
You can also bring your custom URL overlays into Studio 2! Check out our video below for more information.
Custom Overlays from Kudos.tv
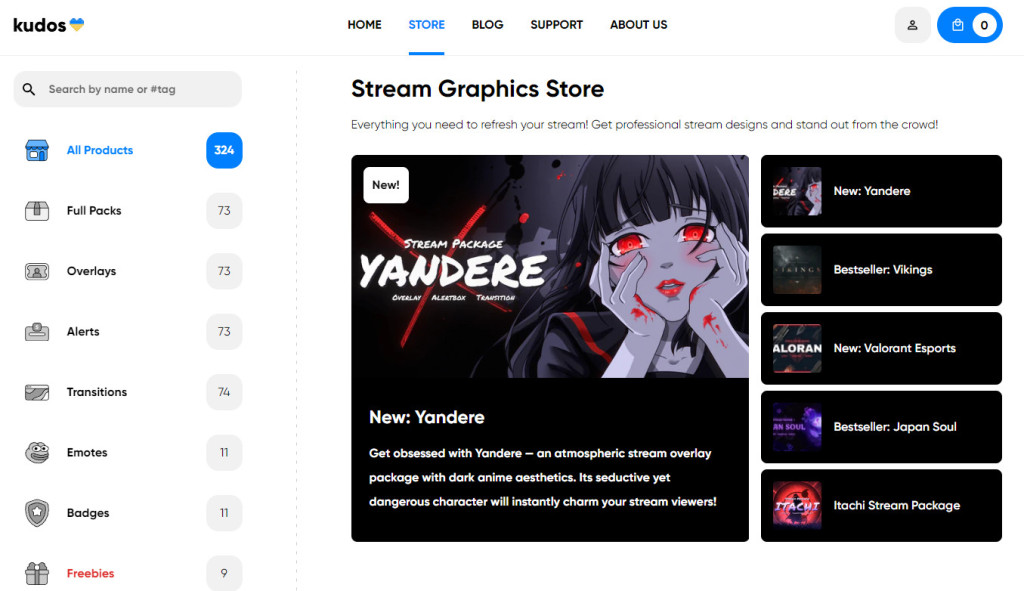
The store makes it nice and easy to see exactly what you’re getting in each pack, and with both free and paid options everyone can improve the production value of their stream.
Head over to Kudos.tv for:
- Stream overlays such as webcam, chat box, and stream labels
- Stream alerts
- Stream screens such as starting soon, be right back, and stream ending
- Stinger transitions
- Twitch panels
- Sound FX
- PSD files to customize your own icons and Twitch panels
Adding, Editing, and Deleting Twitch Info Panels
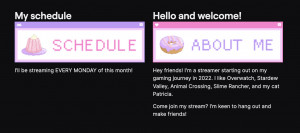
The next customizable component of your Twitch channel are your Info Panels. These panels act like an ‘About Me’ section, displaying information about your channel and yourself. You can display information such as your social media links, your game and streaming schedule, or just about anything you’d like.
Adding a new Info Panel to your Twitch channel
- Unlike the last few customizations, adding and editing panels is done through visiting your channel page. Go to twitch.tv > click your profile image in the top left-hand corner > click Channel.
- Once you are at your channel, click About. There will be a small toggle under your Bio that says Edit Panels – toggle it to ‘on’.

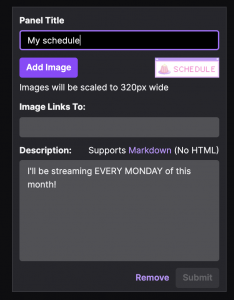
3. Click on the big square with a + in the middle. This will allow you to add text or upload an Image Panel.
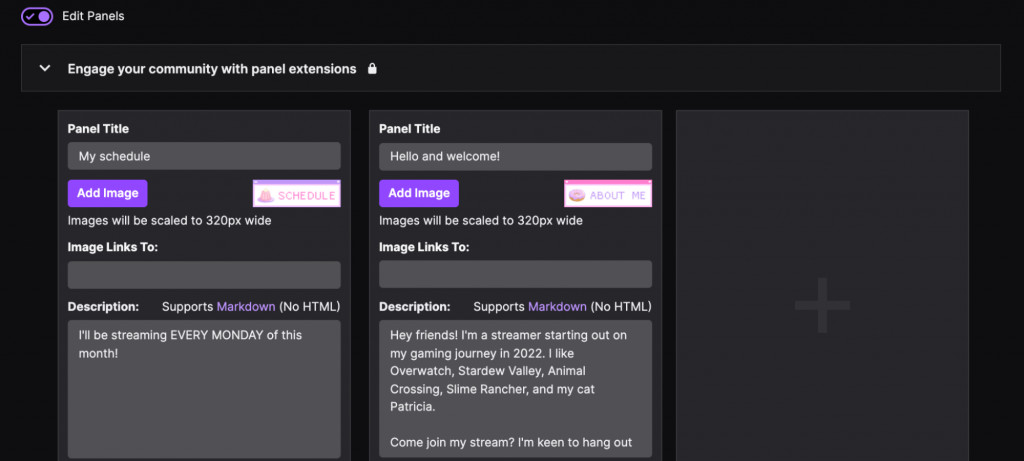
4. From there, you can give your panel a name, add an image and a link, and a description.
5. You will also see the option to add Extension panels, which allows you to link your social media pages and other content you’d like to feature.
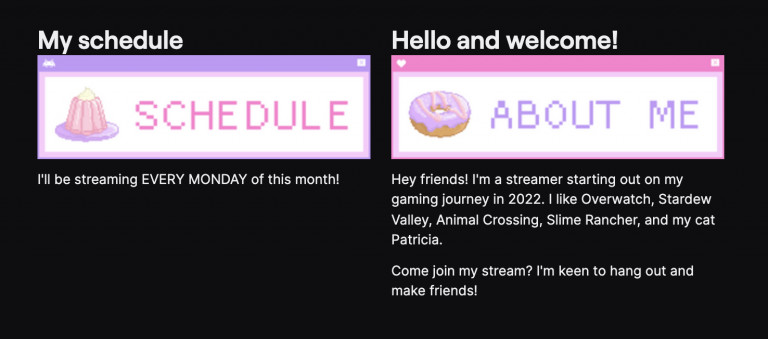
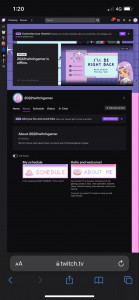
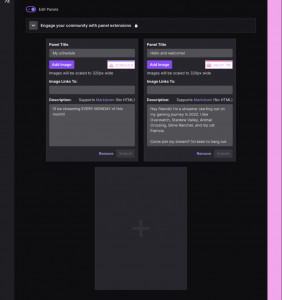
6. Once panels are added, they will look something like this:
If you don’t have any panels to hand you can always grab some online from stores like Kudos.tv, they even have some free panels available!
How to edit and delete Twitch Info Panels
- In the same way that you add Info Panels, you can also edit and delete them as desired. Toggle the Edit Panels switch to ‘on’.
- From there, you can freely edit the information on all of your panels.
- Select Remove to delete a panel.
- Toggle the switch back to the ‘off’ position when all your changes are complete, and you’re done!
Adding and Editing Twitch Info Panels from your Mobile Device
If you’re not using a computer to customize your Twitch channel, the above instructions will still mostly apply – you’ll just need to use the web browser on your mobile phone. This is because the Twitch mobile app does not provide an option for adding and editing Info Panels at this stage (however, you can customize your username and bio from the app).
To navigate to the right section on your mobile browser can be a little tricky, so try to follow these steps as closely as possible:
- Open your mobile browser and type in dashboard.twitch.tv. You will be asked to log in, and it should bring you to a page that looks like this:
2. Tap your profile image in the top left-hand corner, but don’t click on Channel, as this will take you over to the Twitch app.
3. Instead, click on Account Settings. This will take you to a page that looks like the desktop layout:

4. Click on your profile image once more, and then tap Channel. You’ll be able to see your channel just as you would in a browser.
5. Tap on the About tab, toggle the Edit Panels switch to ‘on’, and you’re ready to add or edit a panel just as you did on your desktop browser:
Editing and Deleting Your Twitch Profile from a Mobile Device
At times, you may decide that you want to edit your profile for a fresh aesthetic look. You may even want to disable it entirely and make a fresh start, especially if your channel has changed its creative direction or theme.
To do this from your mobile device is fairly simple:
- First, go to dashboard.twitch.tv and log in. Tap on your profile image and click Account Settings.
- In the Profile tab, you will be able to edit your Profile Picture, Profile Banner, Username, Display Name, and Bio exactly how you would on a desktop browser.
3. From the same page, you can also Disable your Twitch account.
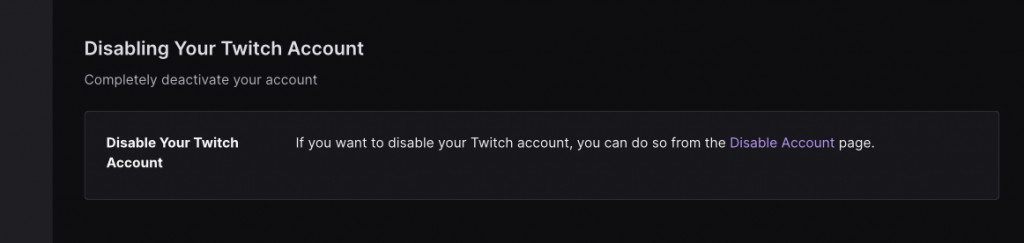
Note: To delete your account altogether, you will need to type twitch.tv/user/delete-account into your mobile web browser, enter your reason for deleting, and then click Delete Account.
Final Thoughts
Whether you are an avid gamer who’s changed your channel a million times over, or a newbie who has just learned how to stream on Twitch, customizing your Twitch channel is a great way to attract the audience you want.
By customizing the elements above, you can design your channel to perfectly fit the content you stream. A million-subscriber channel is well within your reach!
Now that you’re well-acquainted with the platform, are you excited to host your first live streaming session on Twitch? Here’s your chance to do Twitch Game streaming at no cost, with a free gamer trial session on us!